 |
|
|
 |
|
 |

71 CHALLENGER CONVERTIBLE
Our good friend and 'Man-on-fire' Lance (previous orange 68 GTX build) pulled a car out of storage he has had for a while, just waiting on its turn. Its a 340 automatic, power steering, manual drum brakes, non-a/c, power top car. Was B7 blue with a B5 blue interior and white top. We will be shooting for E5 red with a white interior, mild 340 auto, 323 sure grip and full TTI exhaust. Will get an Evans Upholstery seat recover, Advance Autobody paint and body work, all new chrome, a set of our Magnum 500's, power disc brakes, and several other goodies along the way. Its at the body shop now, and we will be preparing pieces for its return, so keep watching this page as things progress. |
Once it got to Advanced Autobody (720 Graham, Emporia KS 620-343-7870), the head wizard determined that the front fenders had so much bondo and rust that a new set was needed, the quarters were poorly manufactured and fitted wrong, both doors would need replacement due to damage, the trunk floor was rusted, front and rear valances were trashed, trunk lid was off a newer Challenger and had no holes for a wing, and the front inner fenderwells had enough rust and patches that they also needed new metal. Framerails, floors and hood were about the only thing that didn't need major work or replacement.
All the metal was replaced and imperfections from the manufacturing process were worked out to perfect smoothness. All the new panels went on the car and aligned. Once it was ready for paint, the new white convertible top and liner was installed to avoid the chance of scratching the paint while installing. Then it was taken back apart to shoot all the edges and hard to reach places, and the underside of the hood and trunk. The quarters, rockers and engine compartment were shot first, in E5 Bright Red base/clear. Then the hood, fenders, doors, trunk lid and valances were squirted. After a day or two, it was put back together, wet sanded and buffed. |
With the body off for a small miracle, we had time to ready the pieces it would take to put it back together. The seats were sent off to Joes Upholstery in Cottonwood Falls Ks to be recovered the factory pattern in white vinyl. Dash pad was sent off to Just Dashes and came back perfect--expensive but perfect. Got a factory appearing radio that was converted to a high power AM/FM with a 140 watt subwoofer/rear channel. The dash was filled with Cerwin-Vega 3" speakers in the outer factory positions, and another C-V dual voicecoil 2 channel speaker in the middle hole. Did this in the front to get good sound, and pick up a back Channel and all the missing bass in the rear without cutting holes anywhere they weren't supposed to be. The dash assembly also picked up a set of rallye gauges and the harness was adapted for the hidden MSD Streetfire ignition controller.
The K frame and front suspension parts were blasted and painted, then fitted with new parts and polygraphite bushings, as well as an oversized Hellwig sway bar. Once the engine was back, it was placed on the K frame with the fresh 727 and rigged up with all the bolt on accessories. Steering gear and pump were sent off for complete rebuild and stage 2 firmness at Steer & Gear. This make for a fresh, dependable well handling package with no worries. And its ready to be bolted in with minimal over-the-fender work.
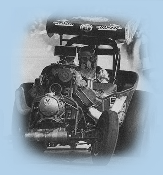
The replacement 340 for the car was sent off to Mid America Racing Engines in Washington Iowa for a complete rebuild. About the only reusable piece there was the block and head castings. New crank and rods, bored .030 and fitted with forged pistons, roller cam/lifters/rockers, new valves/springs/seats in the X heads, and completely balanced. With an aluminum intake and 650 Quickfuel carb the engine put out 355HP@5900RPM and 355ft/lb@3800RPM. It was dynoed at the engine builder. Would like to repeat myself on something--I cant stress enough the job Dave did on the engine. His shop is a fully equipped facility, and nothing was done outside his shop, or by anyone else but him, including the dyno. This assures you that ONE guy is watching and responsible for the high quality you need in a big investment, and the quality is beyond hospital grade.There is a huge value in having your engine dynoed at the shop--armed with a dyno sheet you will know not only in real numbers what you have, but that the engine is right and ready to run when you get it, and with flat tappet cams, you wont need to burn up your new headers breaking it in. Big bonus right there. You can season coated headers without worrying about the cam going flat from improper break in, and it saves you from either burning up your coatings or changing the headers. If you want to maximize your engine fund dollars, call Dave at 319-653-6282 and get on the waiting list, but listen carefully and make it fast--he is busy and to the point. Whatever you spend, its a bargain. |
The body is back, the engine and front suspension is ready, the dash is done, the seats and interior pieces are there. To be able to put it all together, a couple other things need to happen. The rear end comes out to be rebuilt--installed a fresh 489 cased 3.23 True Trac from DTS, a new pair of green bearings on the axels, and rebuilt the rear drum brakes. While that was out, the bottom of the car was over-undercoated, and all new stainless lines from Right Stuff Detailing went in with a new booster and master cylinder. The fuel line and sender was upgraded to 3/8" and a new stock tank was installed. After the rear end and springs were detailed, they were installed with a huge Hellwig rear sway bar.
Back on 2 wheels again, only this time on the back we made a pair of 15x8 Magnum 500's wearing 275/60-15 BFG's. The engine and trans was set in place under the car and the body goes right down onto it. Once in place, another pair of 15x7 Magnums with 245/60-15's holds the front up. From there, the new 2.5" TTI exhaust flies right in place, X pipe and all.
Back to the inside, while the doors are accessible, new glass goes in for that fresh look, and the entire floor pan gets treated to a soundproofing/heat barrier. Wires to the subwoofer are run, and the dash assembly is installed. Note: do all this BEFORE you put in the windshield for easier access. A new hand built engine wiring harness is installed along with an aluminum radiator. Now with the car basically assembled, it is filled with fluids and test fired. Once all the bugs are worked out, its ready for the alignment shop.
Like to take this chance to talk about BUGS. They come in all shapes and sizes, and can hide anywhere. Sometimes they are small and many, sometimes there is one or two and they weigh 50 pounds each. I like the big ones because they are easier to find. This car had several small ones. There is a lot of test fitting, modification, altering, and re-fitting before anything is done for the last time. Door glass can be a major pain if you are missing any parts. Electrical problems can pop up at the last minute. Reproduction pieces and panels have to be fitted and sometimes altered to fit correctly. A convertible adds to the frequency of this happening, and the assembly process is not 'like on TV' and happens overnight in a single episode. Backordered parts, wrong packaging and just plain forgetting to order parts happens, and takes up time.You can stand there and explain a process in one sentence to make it sound easy, but it all takes time. If you are starting with a bare shell, allow time and money to simply collect the pieces it takes to put it together. If possible, a more complete car will give you guidance to the pieces you need to replace, rather than wondering what pieces are missing. There are very few 71 Challenger convertibles out there and a shell was the only option, so we made the best of what we had to work with. |
Its almost done now. Had it running long enough to season the headers, check the timing and top the fluids. Re-curve the distributor to the engine builders specs, and set the ride height, then its off to the front end shop. All the freshly polished stainless trim and stripes really set the red and white off. After its aligned, its the best part of the job--test driving it till everything is right for the new owner. Just in time for spring, if the snow ever melts where he lives. |
|
|
 |
 |  |
|


")


